SSH (easy setup)
This is probably one of the most useful things OliveTin is used for - just plain old SSH, which allows it to easily connect from a container to any server running on your network to run commands. This is also the preferred method of running commands on the server that is hosting the OliveTin container image as well.
|
Note
|
This is the easy method of setting up SSH with OliveTin - this generates a new SSH key for you, and a configuration file that disables SSH host key checking, to make it faster to do useful things with OliveTin. This is fine for most homelab setups, but if you are using OliveTin in a production environment, you should use the more secure method of setting up SSH and set it up manually, see SSH (manual setup). |
SSH from inside a Container - setup instructions
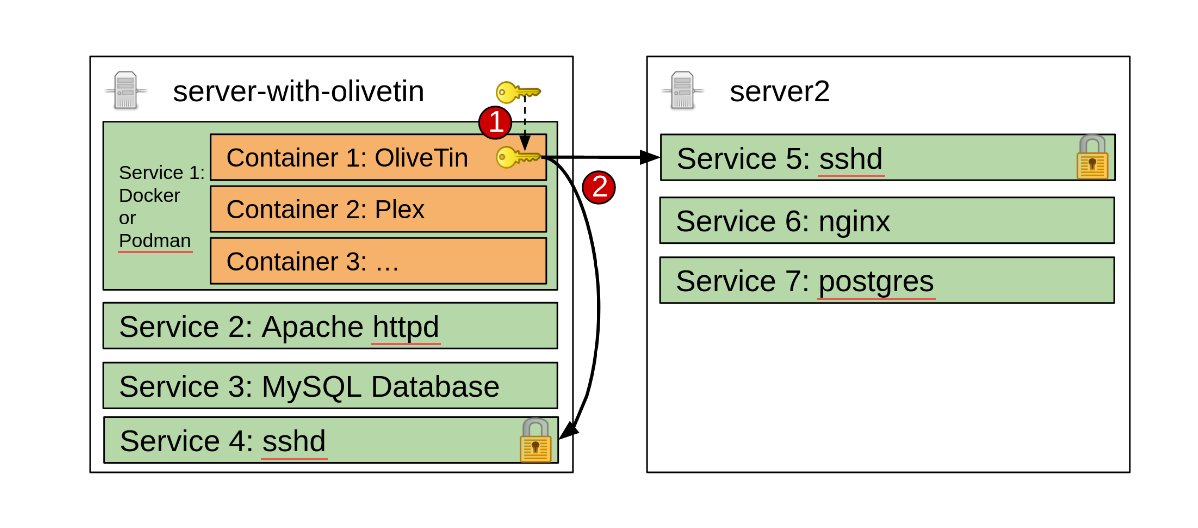
Visually, this is what it looks like - OliveTin is running in the (orange) container, and then can either connect back to server-with-olivetin or server2.
Step 1: Run the olivetin-setup-easy-ssh script
Setup an action as follows, to use the builtin olivetin-setup-easy-ssh script that comes with OliveTin containers. This script does not work on Windows, MacOS, or outside of a container.
actions:
  - title: Setup SSH
    shell: olivetin-setup-easy-ssh
    popupOnStart: execution-dialog
Step 2: Use the configuration file in your actions
To use the configuration file generated by the script, you can use the following in your other actions:
actions:
  - title: SSH into a server
    shell: ssh -F /config/ssh/config root@myserver '/opt/script-on-my-server.sh'